Raycasting Basics
This tutorial introduces raycasting, a foundational technique in game development and computer graphics used to simulate line-of-sight, detect collisions, and render 3D effects in 2D environments.
Written by: Shaun Ratcliff
Last updated: 08 Dec 24
Full C# and Python code for this tutorial is still in development.
Introduction to Raycasting
Section titled “Introduction to Raycasting”Raycasting is a technique used in computer graphics and game development to simulate how light or vision interacts with objects in a virtual environment. By casting an imaginary ray from a source point (like a player’s position in a game), we can determine what the ray intersects with, how far away the object is, and how to represent that interaction visually.
Think of raycasting as shining a flashlight in a dark room. As the beam travels forward, it reveals objects in its path. In programming, this concept allows us to calculate collisions, detect objects, or render 3D scenes in a 2D space.
Raycasting is often used in:
- 2D games: To determine if a player can “see” an enemy or if a projectile hits a wall.
- 3D rendering: Simulating 3D environments, as seen in classic games like Doom or Wolfenstein 3D.
- Physics simulations: Calculating line-of-sight or detecting where a ray intersects a surface
At its core, raycasting is about using mathematics to track the path of a ray, calculate where it hits, and decide what happens next. It’s simpler than full 3D rendering techniques, making it an excellent starting point for understanding game development concepts like collision detection, shading, and spatial relationships.
Important SplashKit Functions Used in This Tutorial
Section titled “Important SplashKit Functions Used in This Tutorial”Key Raycasting Concepts
Section titled “Key Raycasting Concepts”To understand raycasting, we need to break down a few fundamental concepts.
The Ray
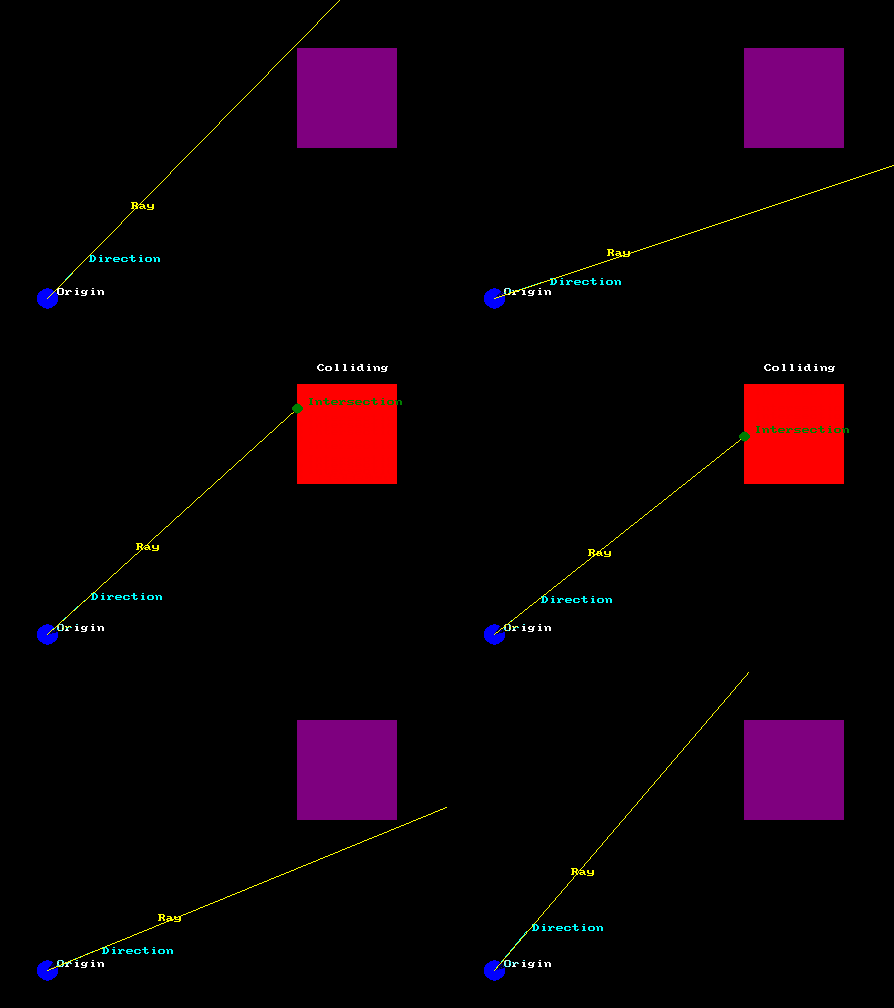
Section titled “The Ray”A ray is like a one-way laser beam that starts at a specific point and travels infinitely in a certain direction. In raycasting, we use rays to simulate vision, light, or projectiles. Imagine shining a flashlight in a dark room—the beam you see is a good analogy for a ray.
The Origin
Section titled “The Origin”The origin is the starting point of a ray. In a game, this might be the player’s position or the source of light. The ray begins here and travels outward.
The Direction
Section titled “The Direction”The direction of a ray determines where it travels. In SplashKit, this is represented using a vector. SplashKit’s vector_from_angle function simplifies converting an angle into a normalised vector, saving you from manually handling trigonometric calculations. This lets you focus on building your program rather than working out complex mathematical formulas.
The Intersection
Section titled “The Intersection”An intersection (or collision) occurs when a ray collides with an object in the environment, like a wall or an enemy. The intersection point tells us where this collision happens, which can be used to calculate distances or simulate effects like lighting or vision blocking.
You’ll be able to use the concepts and apply them in your program in some way:
- Represent the ray by defining the origin and the direction
- Represent the object you want to test for collisions, such as a
rectangle. While this tutorial will focus on rectangles first, SplashKit offers other objects such astriangle,circle,bitmapandsprite. - Calculate the intersection. There are different algorithms for different objects, however they all determine if the ray intersects the object and calculate the intersection point and distance from the origin.
- Use the intersection data to trigger the next part of your program.

Generating a Ray
Section titled “Generating a Ray”In our program, a ray is simply a line that starts at a specific point and extends in a particular direction. SplashKit functions make it easy to define these elements and visualise the ray.
Define the Origin
Section titled “Define the Origin”The origin of the ray is the starting point. In our example, we will use the player’s position, which is represented as a point_2d in SplashKit.
point_2d origin = player.position;To make the origin clear on the screen, we’ve drawn it as a blue circle and labeled it as “Player”.
Calculate the Direction
Section titled “Calculate the Direction”The direction of the ray determines where it travels. We’ll use the vector_from_angle function to generate a directional vector based on the player’s viewing angle:
vector_2d ray_direction = vector_from_angle(player.angle, 1.0);Extend the Ray
Section titled “Extend the Ray”To simulate the ray extending out from the player, we calculate a distant endpoint using point_offset_by.
This function takes the origin and scales the direction vector by a large factor (the diagonal of the screen):
double calculate_max_ray_length(){    return sqrt(SCREEN_WIDTH * SCREEN_WIDTH + SCREEN_HEIGHT * SCREEN_HEIGHT);}
point_2d ray_end = point_offset_by(origin, vector_multiply(ray_direction, calculate_max_ray_length()));Detecting Collisions
Section titled “Detecting Collisions”Once the ray is generated, the next step is to check if it interacts with objects in the environment.If the ray intersects an object (such as a rectangle), we calculate the intersection point using the ray_rectangle_intersection function. This function returns the exact point of collision and the distance from the origin:
if (ray_rectangle_intersection(player.position, ray_direction, rect, intersection, distance)){ fill_circle(COLOR_GREEN, intersection.x, intersection.y, 5); draw_text("Intersection", COLOR_GREEN, "arial", 14, intersection.x + 10, intersection.y - 10);}Putting it All Together
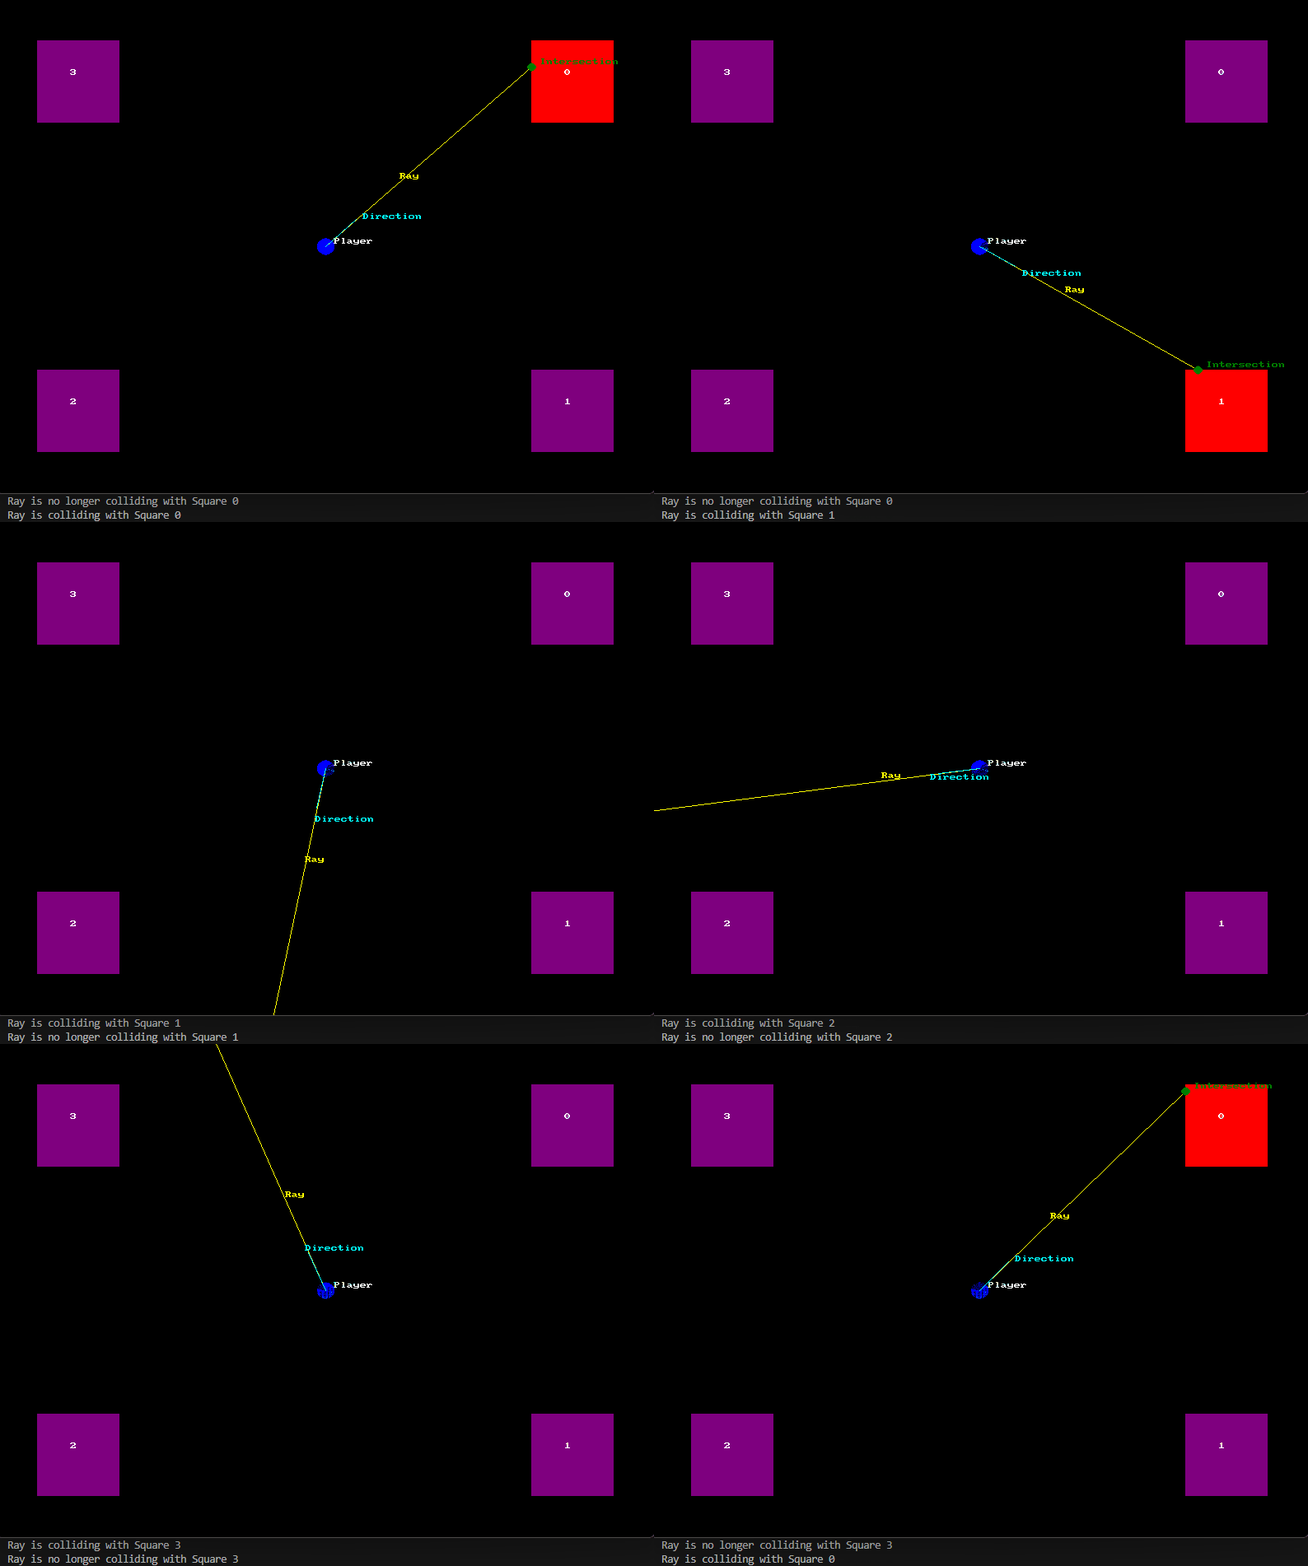
Section titled “Putting it All Together”Now that you have the basics, let’s see it all in action. Click the Test Code in SplashKit Online button below to load the SplashKit Online IDE and run the code yourself. The code demonstrates a simple program where:
- A player emits a ray that extends outward in the direction they are facing.
- The ray checks for collisions with rectangles in the scene.
- When the ray intersects with a rectangle, the collision point is highlighted and the program responds accordingly.
This interactive example allows you to rotate the player’s view using the A and D keys to see how the ray dynamically interacts with the objects in a 2D environment.

Other Uses for Raycasting
Section titled “Other Uses for Raycasting”Raycasting is an incredibly versatile technique with applications that extend far beyond simple collision detection. In 2D games, it can be used for line-of-sight calculations, such as determining whether a player can “see” an enemy or if a light source illuminates an area. In 3D game development, raycasting forms the backbone of techniques like ray tracing, enabling realistic lighting, shadows, and reflections. It’s also a fundamental tool for physics simulations, helping to calculate projectile trajectories or detect where objects collide with surfaces.
Beyond games, raycasting is used in applications like robotics, where it helps machines perceive their surroundings using sensors, and in computer-aided design (CAD), where it assists in visualising intersections between objects. Its simplicity and efficiency make it a go-to method for solving many spatial problems in interactive environments.
Conclusion
Section titled “Conclusion”This tutorial covered the basics of raycasting, breaking it down into its key concepts — rays, origins, directions, and intersections. You also now have a basic practical program to demonstrate these concepts, using SplashKit to create a dynamic system where a player’s ray interacts with objects in a 2D space.
Raycasting is a foundational skill in game development and graphics programming, and the concepts you’ve learned here can be extended to more advanced scenarios. Experiment with the example code, modify it to test other shapes, and explore the possibilities that raycasting unlocks in your projects.